Drawing and Updating with Canvas
Last tutorial we started to build the basic game loop and did some basic work on creating a generic Entity class. In this next tutorial we will continue to work on the game engine and start to fill out some of the core functionality. We will work on getting our first entity created and onto a browser to see how all this stuff works.
Before we start let’s startup the grant task so we can make sure our code is validate and minimized while we are working on the code. Open a command prompt and change the directory to where you have the game engine code located. Here is an example of the commands I ran to get grunt started:
c:\temp>cd \grunt
c:\grunt>grunt watch
You should now have the grunt watcher script running and watching for changes to the files. This will help save some steps as we work on the project.
Now then the engine has no real way to track entities so we will need to add two new function to the engine to help us manage entities. Add this section of code right after me._isRunning definition just before the draw function.
	me._entityList = [];
	me._entNextId = 0;

	me.add = function (ent) {
		// Make sure we have a valid entity
		if (ent !== undefined) {
			ent.id = me._entNextId;
			me._entNextId = (me._entNextId + 1) % 2000000;
			ent.parent = me;
			if (me._entityList.push !== undefined) {
				me._entityList.push(ent);
			} else {
				// Going to add the entity to our list the old fashion way
				me._entityList[me._entityList.length + 1] = ent;
				console.log('Entity added the old fashion way');
			}
		}
	};
The first two lines are just simple data structures to help manage the whole entity system. The array will work like a collection and we just need to loop through all the entities when performing the basic engine steps. The first thing in the add function we need to check for is a valid entity. There are also other checks we can perform but those are something we can add later we just need something basic in place for now.
Now we assign a new entity id to the entity so that we can quickly address this specific entity later. You may be asking yourself a couple of questions like why don’t I just use the index of the array as the id instead? Well that would be fine but every time we remove an entity we would have to re index the array which can be a time consuming problem. The next question is what is the next line for why didn’t you just use the increment operator instead of the old item = item + 1 snippet? Well look at that code carefully we are adding one so the next id will be unique but we are also setting it up so that once we hit the 2 million mark it will start the number back at 0. The reason for this is if the engine runs long enough and has enough adds and removes it may hit the max size a value can store and crash the game. So instead we put in a very large number to make sure this doesn’t happen. Don’t get me wrong you may still hit this magic number and cause other problems like items in the array having the same id number but this is something we will solve in future tutorials.
Next we parent the entity to the game engine. This is so we can add some custom cool code to the entity class to call the engine from any entity. After that we just check to see if we have a modern browser and if we do add the item to the list, if not do the same thing but using the old array trick from when JavaScript was born.
So now we can add entities to the engine but at some point we will also want to remove an entity. This is where this next code block comes in handy.
	me.rm = function (id) {
		var ent = null;
		// Check if the id is valid
		if (id !== undefined && id !== null) {
			// Brute force our way through the list
			for (var i = 0; i < me._entityList.length; ++i) {
				if (me._entityList[i].id === i) {
					ent = me._entityList.splice(i, 1);
				}
			}
		}

		return ent;
	};
This should look very familiar to us because we saw both these functions in the Entity class. We could of just created a base entity and then just add everything to this object which would be called a root entity. For now we will leave these in the engine and maybe refactor the design later as the engine progresses. Honestly there is a design change that will come but that is for a future tutorial, blatant plug to watch my site.
Now that we have a way to add and remove entities from the game engine it is about time we start writing code to handle all this great stuff. First off we need to regress and learn some new things about HTML and how we are going to manage drawing things to the screen. HTML 5 introduced a new tag which has some really cool new feature and opened up a lot of interactivity to website without having to install Adobe Flash. They called it the canvas tag! Okay so we have the canvas, sounds like a painting class I took in collage. The tag itself is nothing special we can just add it to any website and sit there and watch it do nothing.
Actually canvas was a really amazing addition to the HTML specifications. This one tag allows us to tie so much fun graphical tools to a website. We have very rudimentary tools now that allows us to paint things to the screen by code instead of having to create images to do the same things. Canvas has a JavaScript object in it that allows us to connect, draw, save, and animate which we will get to in a minute. For now we will need a way to address the canvas on the page. To do this we will create an HTML document like this:
<!DOCTYPE html>
<html xmlns="http://www.w3.org/1999/xhtml">
<head>
    <title>Tutorial 04</title>
</head>
<body>
	<canvas id="theEngine"></canvas>
</body>
</html>
Running this code in a browser doesn’t do anything magical yet but just wait. Next we now need to grab the canvas and get the context from it which will allow us to draw. To do that we will now update the GEngine class to include a few data elemetns and change the initialization function. Add the following code just before the init function.
	me.canvasId = 'theEngine';
	me.contextType = '2d';
	me.autoRun = false;
	me.fps = 30;
	me.world = {
		size: null,
		canvasSize: null
	};
Please note there should only be one fps definition in your code. I like to keep the defined variables in alphabetical order just because it makes it easier to look up a variable name. Plus I also like to keep them group together in one chunk so there is only one place to look for variables. Or in this case there are two places to look because we also have engine variables that shouldn't be over written being defined after the init function. This will change once we delve into working with classes in JavaScript but for now this is a cheap work around.
Here is the new Init function that we will go through.
// Initialize game-engine core code
	me.init = function (cfg) {
		// Assign config to me
		if(Object.assign !== undefined){
			Object.assign(me, cfg);
		}
		// Startup canvas
		me.canvas = document.getElementById(me.canvasId);
		if (me.canvas === null) {
			// TODO: Auto add canvas to the body of site
			console.log(me.canvas);
		}// Endif me.canvas is null

		// Try and get context from canvas
		me.ctx = me.canvas.getContext(me.contextType.toLowerCase());
		if (me.ctx !== null && me.ctx !== undefined) {
			me._isRunning = true;
			// Check if we need to set the canvas size
			if (me.world.canvasSize === null) {
				me.world.canvasSize = new Vector2D({ x: me.canvas.clientWidth, y: me.canvas.clientHeight });
			} else {
				// Set canvas to size of world
				me.canvas.width = me.world.canvasSize.x;
				me.canvas.height = me.world.canvasSize.y;
			}
			// TODO: Add splash screen
		}// Enduf ctx is not null

		// TODO: Remove demo context code when done
		var oldStyle = me.ctx.fillStyle;
		me.ctx.fillStyle = '#808080';
		me.ctx.fillRect(0, 0, me.world.canvasSize.x, me.world.canvasSize.y);
		me.ctx.fillStyle = oldStyle;

		// Check if autoRun is true
		if (me.autoRun) {
			me.run();
		}// Endif autoRun
	};
There is a lot of new code to the init function as you can see. Don’t worry we will go through all of it and explain what is going on. The firsts section of the code should look familiar because this was the initial code we added to create this function. It’s just checking if the cfg variable is valid and if it is assigning all the object variables from it to the game engine.
Now then time to setup the canvas. It may look complicated but honestly this is some very simple code. First we call the document.getElementById function which is part of the DOM (Document Object Model). We can use this function to grab any element defined in our HTML page with and ID defined. Please note though that this is only up to date as the document is rendered so if you call it too soon in your code an element my return null because it hasn’t been parsed just yet. This function is best called after the document has finished loading.
After that is done we check to see if the canvas object was not found. There is a big TODO here because at this point for testing I don’t need to finish this code but when we get this ready for production we will need to create the code. It serves as a good reminder he have more work to do later. I add these a lot to my code and the editor I use tracks these and adds them to a list for me to look at when I’m almost done with a project.
Once that is all figured out we assume that now the canvas object has been found or created if needed. The next step is to call the getContext on the canvas object and pass it the type of context we want. Since the getContext function is case sensitive I’ve added the toLowerCase function call to make sure all text is lower case. There have been a few time where tracking down a missing context was related to a value being in upper case. There are a couple of values we can pass in as the context type for now we will be working with the 2d context.
The last couple of lines are just to show that our context is being created and we can use it. We will discuss some of the different types of drawing functions available to us in the context when we start creating some primitive entities. The last section of code just check if the programmer wants to automatically start the game engine which is just a nice feature.
Running this code should produce a grey square on the screen. To test this we will need to create an HTML file that includes the engine source and then creates the game engine. Here is the modified HTML code that we can use to test our new engine:
<!DOCTYPE html>
<html xmlns="http://www.w3.org/1999/xhtml">
<head>
    <title></title>
	<script src="/../js/game-engine-1.1.2.js"></script>
	<script>
		function start() {
			var game = new GEngine({
				canvasId: 'theEngine',
				fps: 60
			});
			game.run();
		}
	</script>
	<style>
		body{
			margin: 0;
			padding: 0;
		}
	</style>
</head>
<body onload="start();">
	<canvas id="theEngine"></canvas>
</body>
</html>
If you’re not familiar with HTML then this may look a little confusing at first. For now just ignore that and focus on the code that is between the tags. The first one is just telling the browser that we want to include the current game-engine source file. The second script tag is where we are going to instantiate the game engine object.
In the second script tag we just create a function called start which gets called when the browser is finished rendering the document. When the start function is called we create a new game engine object and pass it the fps and canvasId values. When you open this up in a browser you should see a grey screen instead of a white screen (default browser color). If that isn’t happening for you then check your code and compare it to what is on the repository.
That was a lot of work just to get our engine to turn our browser screen grey. We could have done this really quickly if we just wanted a proof of concept. But as we make games that kind of code would have bogged us down in very tedious code to program. Now we have a start to and game engine that will help reduce the amount of code we have to write and start making some really fun and interesting simulations.
We now have a way to add entities to the game engine, the context and canvas objects are being initialized but now we need to fill out the update and draw engine functions. These two functions are the core of the game engine and without them nothing will happen when we add entities to the game engine. So add this code to the draw function:
		if (me._entityList.length > 0) {
			me.ctx.clearRect(0, 0, me.world.canvasSize.x, me.world.canvasSize.y);
			for (var i = 0; i < me._entityList.length; ++i) {
				me._entityList[i].engineDraw(me.ctx);
			}
		}
This code just checks to see if we have any entities registered in the game engine and then loops through each item and calls the engineDraw function of the entity. Now add this code to the update function:
		if (me._entityList.length > 0) {
			for (var i = 0; i < me._entityList.length; ++i) {
				me._entityList[i].engineUpdate(1.0);
			}
		}
Both functions look the same except for the function it calls Granted we could reduce the loop count if we combined the draw and update functions but there may be times where we will either want to run the updates or just the draw functions so separating them will give use more flexibility and options down the road.
That should be all the updates we need to make to the game engine class. Now everything should be ready to go so let's add our first entity and try and draw it to the screen!
Our First Entity
We are going to create a new entity that will draw a circle to the canvas. Note I didn’t say screen because ultimately we are only running this in a browser so we are not directly drawing to the screen but to the canvas in an HTML page.
To help keep our project clean we will create a new folder and call it entities. Now create a new file in the entities folder and name it entitycircle.js. I like to keep the entity in the file name so that when I’m looking through all the files that make up this project it is easy to find all the files that contain an entity definition in it. Here is the basic definition for our new entity:
function EntityCircle(cfg) {
	var me = this;
	var ent = new Entity(cfg);

	me.radius = 10;
	me.fillColor = '#000000';
	me.strokeColor = null;
	me.lineWidth = null;

	Object.assign(me, end);

	me.draw = function (ctx) {
		// TODO: Draw a circle here when asked
	};
}
Not much code is there. Well that is because a lot of the functionality is stored in the parent class. Since JavaScript doesn’t support classes as of ES5 we will use the old way to inherit from a parent class. Once we created a new Entity object we use the Object.assign function to take all the entity function and variables and assign them to the EntityCircle object. Also we extend the Entity class to hold special values that we will need in order to draw the circle to the engine context.
The EntityCircle now has all the functionality we need to make it work in the game engine. The one thing remaining though is what will this entity look like when being drawn to the screen? At this moment nothing but let’s change the draw function to now draw circle to the canvas. Here is the new draw function for the EntityCircle:
		var oldStyle = ctx.fillStyle;
		var oldStroke = null;
		if (this.lineColor !== null) {
			oldStroke = ctx.strokeStyle;
			ctx.strokeStyle = this.lineColor;
		}

		ctx.beginPath();
		ctx.arc(0, 0, this.radius, 0, 2 * Math.PI);
		ctx.closePath();

		if (this.fillColor !== null) {
			ctx.fillStyle = this.fillColor;
			ctx.fill();
		}

		if (oldStroke !== null) {
			ctx.stroke();
			ctx.strokeStyle = oldStroke;
		}

		ctx.fillStyle = oldStyle;
As you can see there are several lines of code to draw a simple circle to the canvas. Most if this is just environmental junk that needs to be tracked so we can return the canvas back to the original state we got it. This is where the oldStyle and oldStroke variable come into play. I store these values so we can return the contex back the way it was passed to our entity.
Oddly enough if we chose to draw a square it would have been simple and only required on ctx draw command. Instead the circle requires a bit more code. First we need to define a context path by calling the context.beginPath() function. The next line is where we do all the drawing which is the arc function. It takes the parameters of x, y, radius, start angle, and end angle.
Wait a second why are we drawing the circle at 0, 0 all the time what if we want to move this circle to a different position on the canvas? This is a very valid concern but take a step back and look at the entity engineDraw function. This is where the power of our entity class comes in to play. The engineDraw function first moves the context to the position where the circle will be drawn and when we are done moves it back. So now whenever we draw something to the screen it should always be 0,0.
Now we close the path just to make sure there are no gaps in our arc. After that we validate our fill color is properly set and then call the context fill function. After that is done we check if there is a stroke defined and if so stroke our circle.
Lastly we will restore the fill style and stroke style to their original values and then close down. There is a lot the engine is now doing for us so this will make our jobs easier when we want to create new entities. Now it is time to create a new circle and add it to the game world and see what happens. Open up the original HTML file and add these lines of code to the start function after the declaration of game:
var cir = new EntityCircle({
				color: '#ff0000',
				translate: {
					position: {x: 300, y: 150}
				}
			});
			game.add(cir);
Now when we load the html file up in our browser we should get the following image:
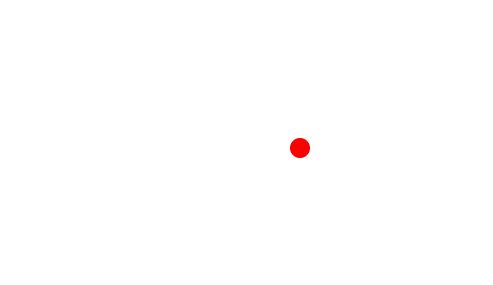
How exciting we are animating a red dot to the screen and it just sits there. I could watch this red dot for hours and enjoy the amazing game engine we have created. Okay for those of you who are reading this in disbelief your right this is not that amazing. It was a lot of work to just put a stupid dot on the screen which we could have done with a whole lot less code then we have now. Well here is where our hard work will pay off in the end. Let’s modify code for our circle object so add the following code to our html file just after the circle definition.
cir.speed({ x: 5.0, y: 0.0 });
			cir.orgUpdate = cir.update;
			cir.update = function (dt) {
				var pos = cir.translate().position();
				if (pos.x > (game.world.canvasSize.x - 10) || pos.x < 10) {
					cir._speed.x *= -1;
					if (pos.x < 10) {
						pos.x = 10;
					} else {
						pos.x = game.world.canvasSize.x - 10;
					}
				}
				cir.orgUpdate(dt);
			};
So the first thing we are going to do is give the circle some speed in the x direction. For now we will focus on this direction. Next we want to save the old update function because it has some cool code we will use during our update function. Now the new update function. This is where some magic happens, we want to grab our current position and check to make sure our x stays within the canvas boundary. We are going to make the ball move from right to left and continue so we will always see our ball move. If we exceed the boundary we will just change the speed’s direction by multiplying itself by negative 1. Next we validate the current position and make sure it is not drawn outside of the boundary of our game world / canvas. Lastly we want to call that old update function so the ball will move.

Viola we are done and now have a bouncing ball to watch. Load this html file up and watch at the marvel you just created a moving ball. That is all for this tutorial, in the next tutorial we will start working on refining the game engine and adding a scene manager so that we can create scene that can be swapped out on the fly.
You can checkout the final project code from github.